Serverless Docker on AWS Lambda with Zappa

I’ve been using Zappa to manage my serverless Python deployments for over a year now. Zappa is magic. If you’ve ever tried to deploy an Amazon Web Services (AWS) Lambda function from scratch, you know the pains. Creating the required Identity and Access Management (IAM) roles, building a zip file with the function and any dependencies, ensuring you have the proper file permissions in that zip, adding the required WSGI middleware, testing your function with mock data, retrieving the output logs, linking your function to API gateway, and the list goes on. Zappa takes care of all of this.
But even with all its magic, there are still some major pains for many Python deployments. Your Lambda zip package can only be a few hundred megabytes, which is easily exceeded as soon as you have any larger dependencies like pandas, numpy, or sklearn. Zappa provides a smart workaround for this by saving your large dependencies in S3 and downloading them at runtime, but this kills response times when your function is cold starting. On top of the size limits, you also need to make sure you are using Python package versions that were compiled for Amazon Linux for any packages with C dependencies. These two nuances quickly add more complexity & headaches to your serverless deployments.
In December 2020, AWS announced new functionality that lets you deploy Lambda functions as container images up to 10GB in size. What does that mean? Instead of pre-compiling all your packages on Amazon Linux, putting them & your application code in a zip file and hoping you are under the limit, you can now just create a Docker image and deploy your function with that.
Today, I’m happy to announce that you can now use Zappa to manage your serverless deployments with Docker ✨🍰✨ .
hello Docker + Zappa!
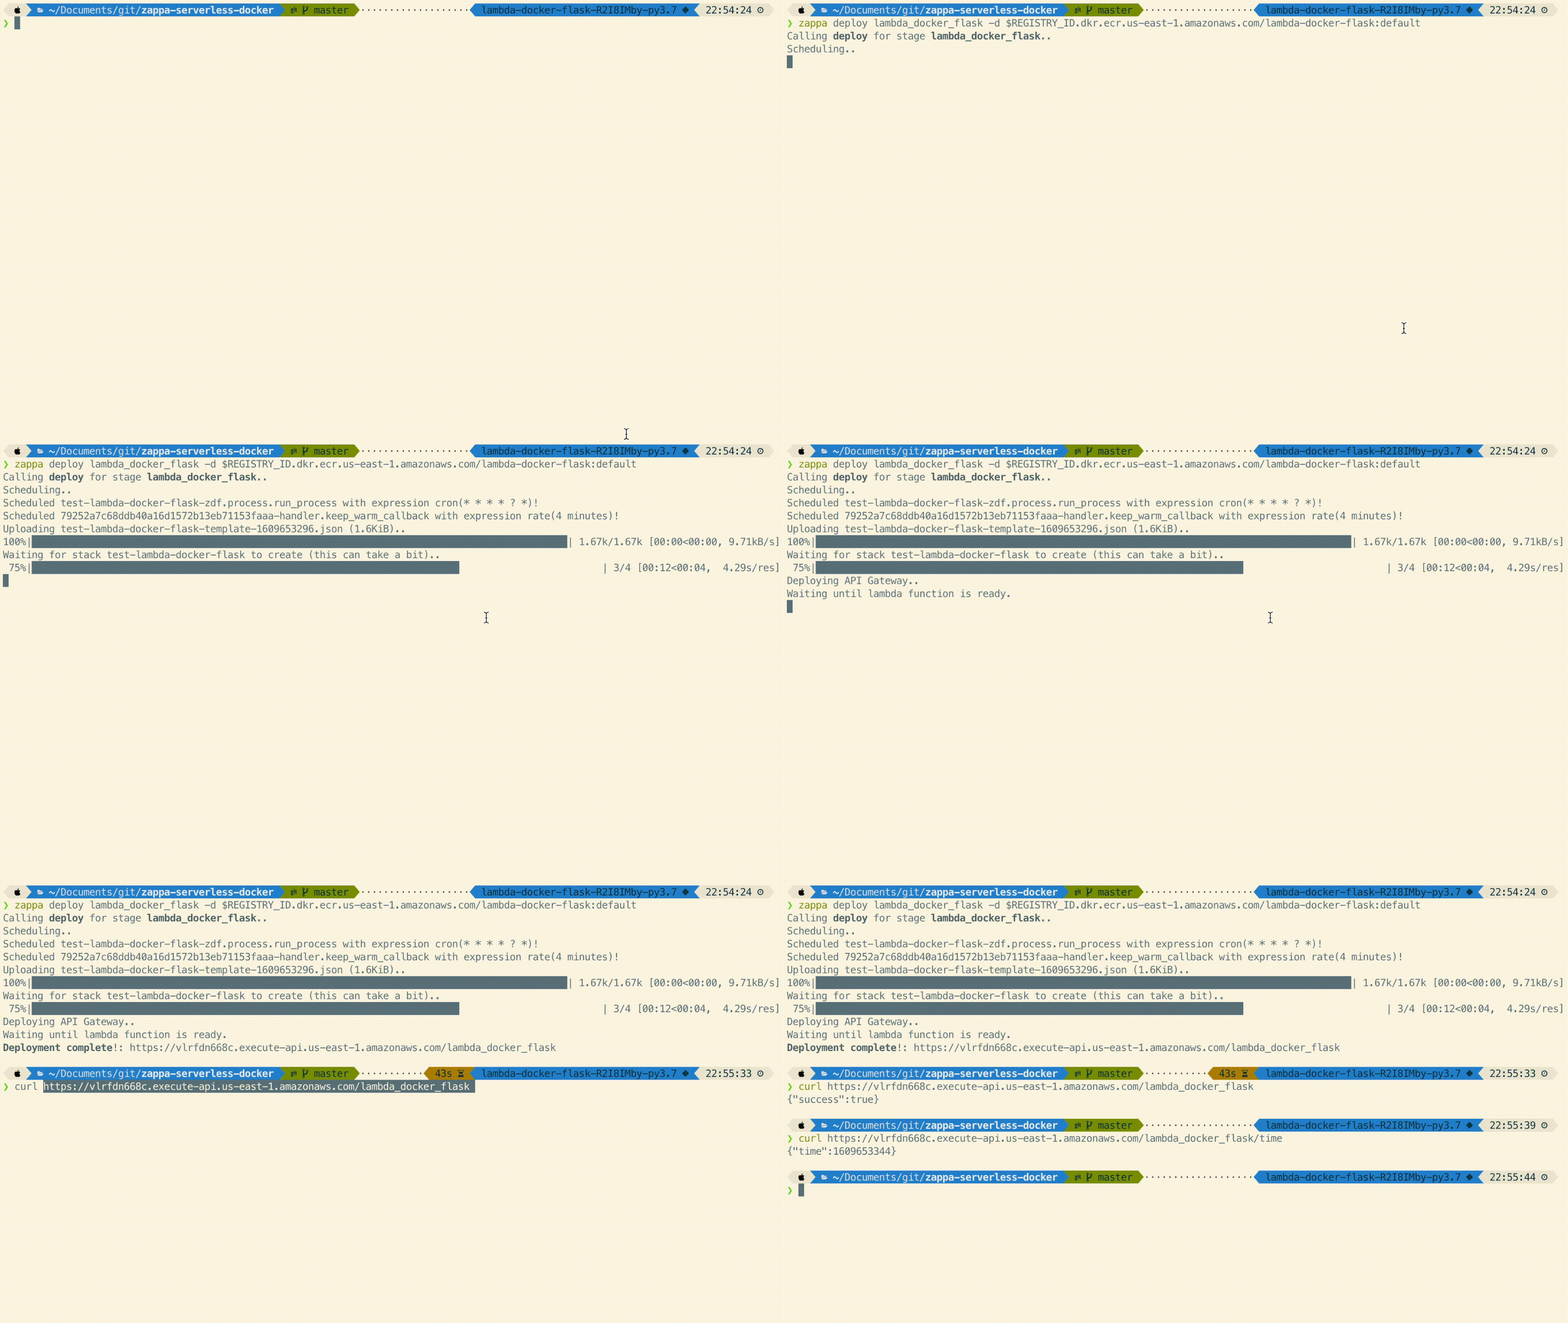
With the latest release of Zappa, you can now deploy and update your Lambda functions with a Docker image. Here’s a quick preview of me doing just that:

What’s going on here?
- I call
zappa deployand supply a Docker image URI to the-d / --docker-image-uriparameter. I’m using a prebuilt Docker image that lives in an AWS Elastic Container Registry (ECR) repository. In a future release of Zappa, we will add in functionality to automatically build the Docker image & push it to ECR so you don’t need to worry about these steps. - Zappa creates the new Lambda function with that Docker image, and attaches a new API Gateway endpoint to it.
- I make a few web requests to new API endpoint, they invoke the Lambda function and get executed in the Flask app running in my Docker container.
For the remainder of the post, we’ll dive into the details that make this work.
Making it happen
The App
The web app we’re deploying is a simple Flask app with two endpoints, / and /time.
# zdf/app.py
import time
from flask import Flask, jsonify

app = Flask(__name__)

@app.route("/")
def serve():
    return jsonify(success=True)

@app.route("/time")
def get_current_time():
    return {"time": round(time.time())}
We’ll also have a batch process we run at regular intervals:
# zdf/process.py
from datetime import datetime

def run_process():
    now_str = datetime.now().strftime('%Y-%m-%d %H:%M:%S')
    print(f"The current time is {now_str}")
Zappa Configuration
Our zappa_settings.json is pretty minimal, and no different from the zappa_settings you’re used to. The only thing worth mentioning is you don’t need to specify a Python runtime since that will be set in the Docker image.
With this settings configuration, we get the following:
- The Flask app in
zdf/app.pywill be served process.run_processfunction will run every 2 hours- The environment variable
EXAMPLE_ENV_VARwill be available in the Docker image
{
    "lambda_docker_flask": {
        "app_function": "zdf.app.app",
        "project_name": "test",
        "s3_bucket": "lambda-docker-flask",
        "environment_variables": {
            "EXAMPLE_ENV_VAR": "prod"
        },
        "events": [
            {
               "function": "zdf.process.run_process",
               "expression": "cron(0 */2 * * ? *)"
            }
        ],
        "lambda_description": "Zappa + Docker + Flask"
    }
}
Building the Docker Image
Dockerfile
As mentioned above, you must provide a prebuilt Docker image to Zappa. This Docker image must be built according to the standards outlined by AWS. Here’s the Dockerfile I used for the demo above:
FROM amazon/aws-lambda-python:3.8

ARG FUNCTION_DIR="/var/task/"

COPY ./ ${FUNCTION_DIR}

# Setup Python environment
RUN pip install poetry
RUN POETRY_VIRTUALENVS_CREATE=false poetry install --no-root

# Grab the zappa handler.py and put it in the working directory
RUN ZAPPA_HANDLER_PATH=$( \
    python -c "from zappa import handler; print (handler.__file__)" \
    ) \
    && echo $ZAPPA_HANDLER_PATH \
    && cp $ZAPPA_HANDLER_PATH ${FUNCTION_DIR}


CMD [ "handler.lambda_handler" ]
The Dockerfile is pretty straightforward. I’m building off a base image provided by AWS, but you can implement yours using a different base image if you’d like. I copy my application code into the image and setup my Python environment with Poetry.
The only Zappa specific steps are the last two. The Zappa handler.py must be manually added to your Docker image, which I accomplish by grabbing the path with a simple Python command. This handler is then specified in the CMD setting, which causes it to be run whenever a Docker container using this image is started. These steps are a must, since the lambda_handler function contains all the Zappa magic that routes API Gateway requests to the corresponding Flask function or lets you execute raw Python commands in your function.
Note, if you’re pipenv instead of poetry, you can run: pip install pipenv && pipenv install. Or if you have a requirements.txt, you can run: RUN pip install -r requirements.txt.
Building the image
With our Dockerfile ready, we can now build it in two steps. From the root of the repository, you can run:
zappa save-python-settings-file lambda_docker_flask
docker build -t lambda-docker-flask:latest .
The first line is the only other nuance involved with Zappa Docker deployments. The Zappa handler relies on a Python settings file which gets automatically generated in the traditional zip-based deployments. The zappa save-python-settings-file command generates this exact same file and saves it to zappa_settings.py in your working directory. When you then run your docker build command, this file will get copied in along with the rest of your application code.
Testing locally
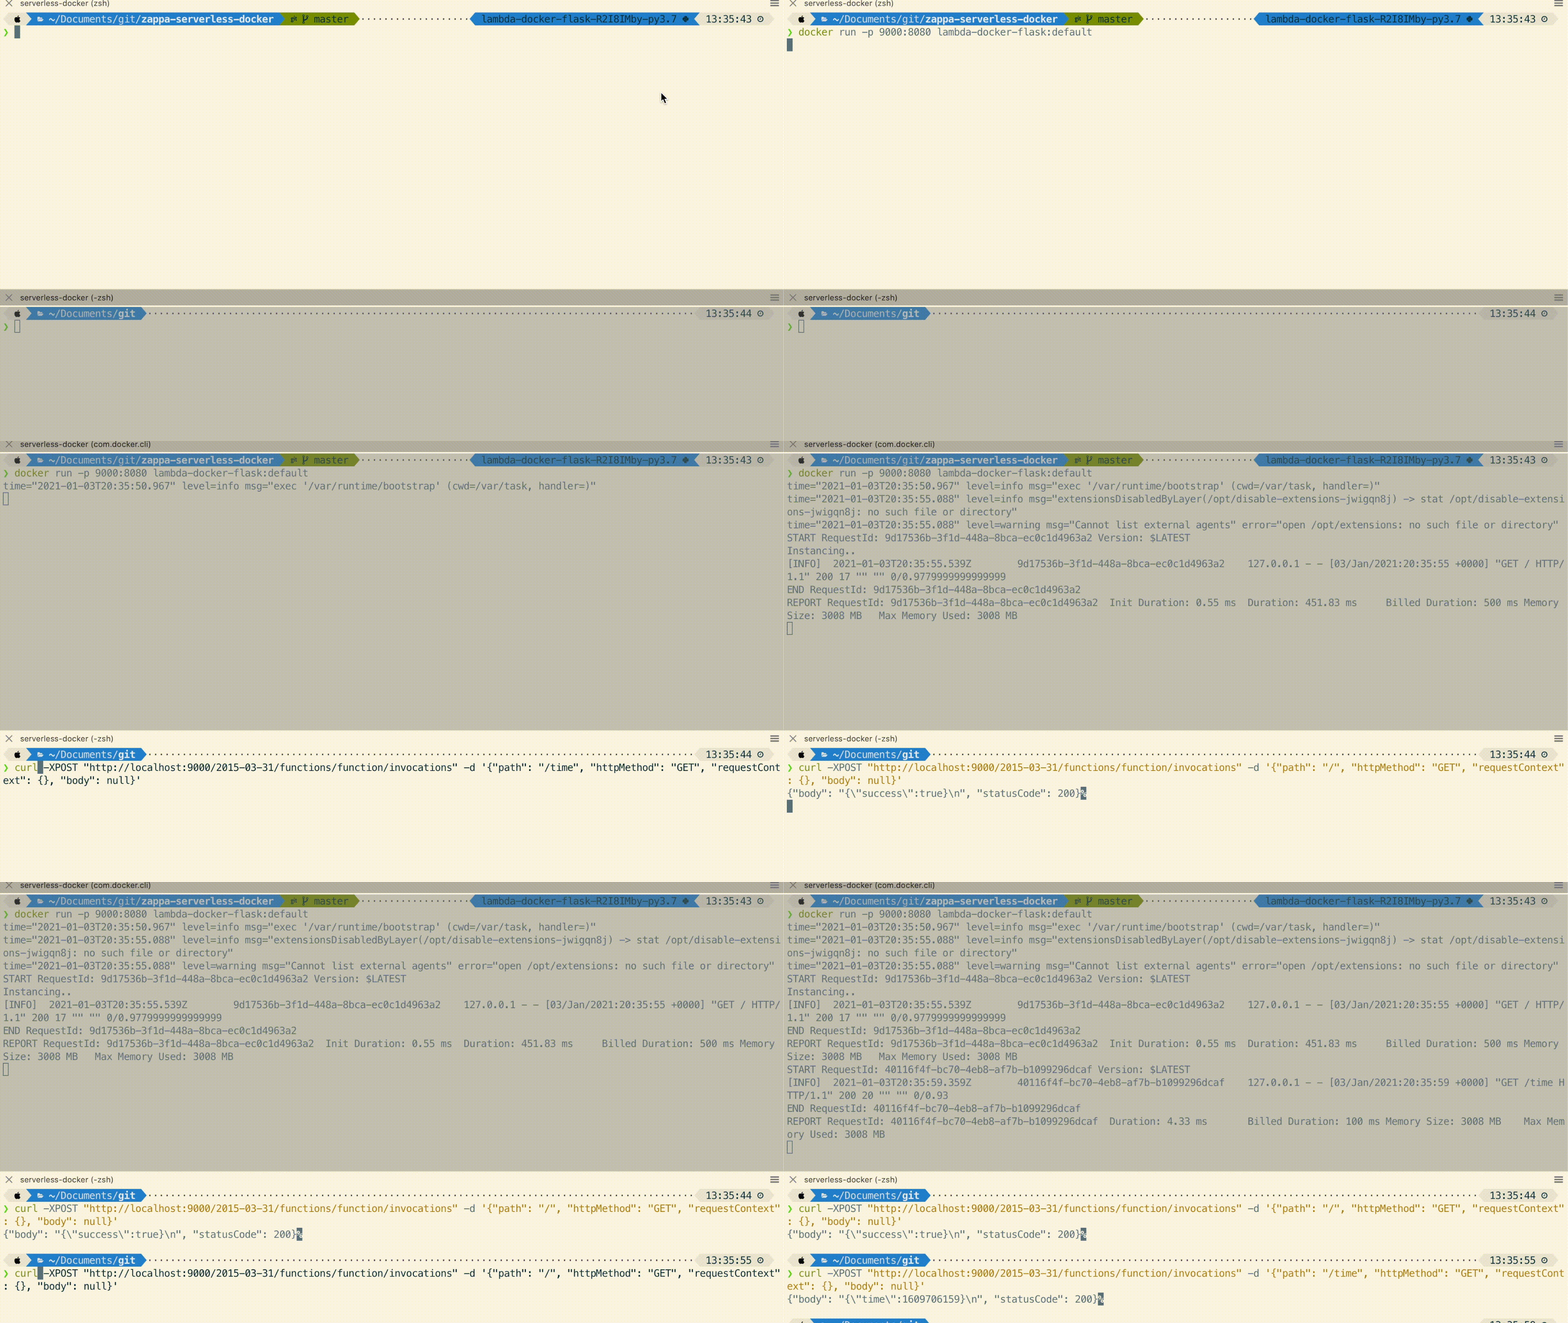
A great thing about Docker based deployments is that you can test out your Lambda function locally. You can launch a new container locally with docker run -p 9000:8080 lambda-docker-flask:latest and then test it with some curl commands. Here’s the commands you’d run to invoke each endpoint
curl -XPOST "http://localhost:9000/2015-03-31/functions/function/invocations" -d '{"path": "/", "httpMethod": "GET", "requestContext": {}, "body": null}'curl -XPOST "http://localhost:9000/2015-03-31/functions/function/invocations" -d '{"path": "/time", "httpMethod": "GET", "requestContext": {}, "body": null}'

Pushing to ECR
In order to deploy a Lambda function with a Docker image, your image must live in AWS ECR. To do this, create a new repository if you don’t have one already, re-tag the image you created above, authenticate with ECR, and then push it!
# create the ECR repository
❯ aws ecr create-repository --repository-name lambda-docker-flask --image-scanning-configuration scanOnPush=true
{
    "repository": {
        "repositoryArn": "arn:aws:ecr:us-east-1:XXXXX:repository/lambda-docker-flask",
        "registryId": "XXXXX",
        "repositoryName": "lambda-docker-flask",
        "repositoryUri": "XXXXX.dkr.ecr.us-east-1.amazonaws.com/lambda-docker-flask",
        "createdAt": 1609279281.0,
        "imageTagMutability": "MUTABLE",
        "imageScanningConfiguration": {
            "scanOnPush": true
        },
        "encryptionConfiguration": {
            "encryptionType": "AES256"
        }
    }
}
# re-tag it
❯ docker tag lambda-docker-flask:latest XXXXX.dkr.ecr.us-east-1.amazonaws.com/lambda-docker-flask:latest

# get authenticated to push to ECR
❯ aws ecr get-login-password | docker login --username AWS --password-stdin XXXXX.dkr.ecr.us-east-1.amazonaws.com

Login Succeeded

# push it
❯ docker push XXXXX.dkr.ecr.us-east-1.amazonaws.com/lambda-docker-flask:latest
Deploying with Zappa
Last but not least, we can deploy our new function in one line:
zappa deploy lambda_docker_flask -d XXXXX.dkr.ecr.us-east-1.amazonaws.com/lambda-docker-flask:latest
Updating with Zappa
If you later make changes to your application code, you can repeat the process above and then update your function with zappa update:
zappa save-python-settings-file lambda_docker_flask
docker build -t lambda-docker-flask:latest .
docker tag lambda-docker-flask:latest XXXXX.dkr.ecr.us-east-1.amazonaws.com/lambda-docker-flask:latest
docker push XXXXX.dkr.ecr.us-east-1.amazonaws.com/lambda-docker-flask:latest
zappa update lambda_docker_flask -d XXXXX.dkr.ecr.us-east-1.amazonaws.com/lambda-docker-flask:latest
And that’s it. If you have any questions, you can join the Zappa slack workspace or comment below. Thanks for reading!
Resources
- The Github repository containing the code examples I used in the demo
- AWS announcement of Lambda + Docker support
- AWS guidelines for building Docker images that will work with Lambda
- Primary PR in Zappa to enable functionality outlined in this post