
Building a home security system with a Raspberry Pi, Python and Slack
Building a home security system with a raspberry pi, python and slack. Project link.
Presented at Pycon Canada 2018, see slides here or watch the presentation here.
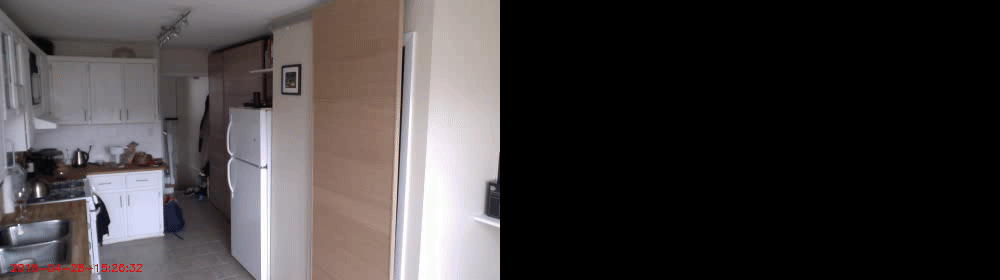
Demo
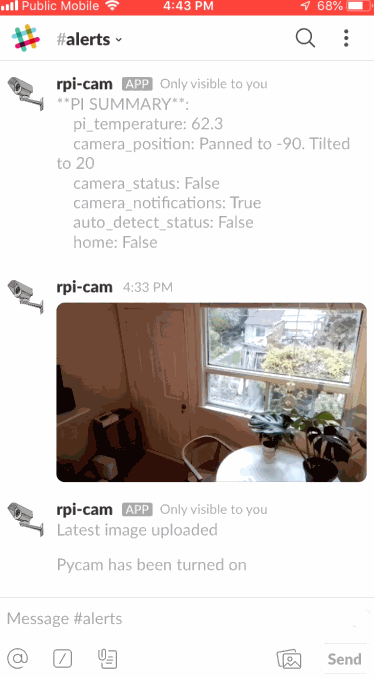
Slack is used as a control system, to get current information about the system, retrieve the latest image taken, or turn the system on/off.
Other things like disabling notifications, automatically turning the system on/off based on who is home, or panning/tilting the camera can also be controlled through slack.
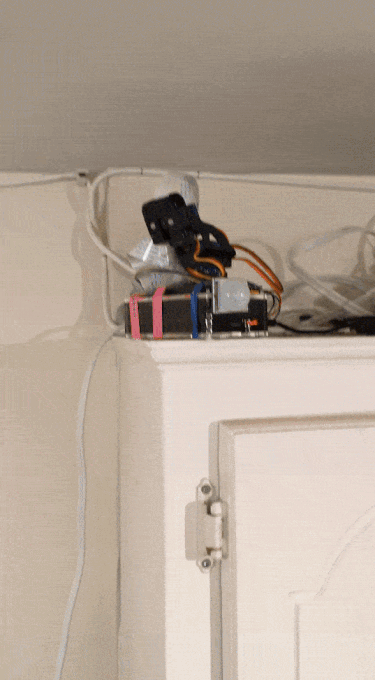
Moving the camera is accomplished by adding a Pan-Tilt Hat. With a simple slack slash command, i.e. /rotate 30 20, the camera can be panned to +30 degrees and tilted to +20 degrees.
When motion is detected, an alert is triggered in slack. If the system is in training mode, it will also prompt for the user to tag whether the image is occupied or not. The response is logged and save for future model tuning.
How it Works
Motion Detection
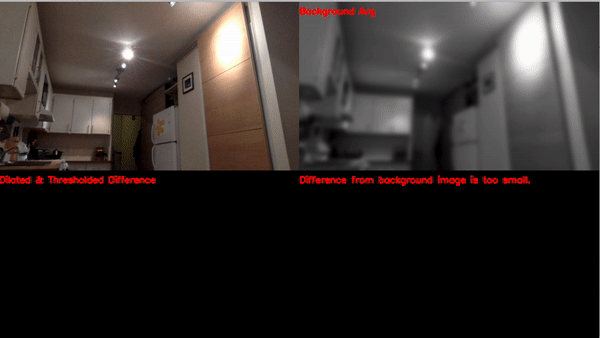
Motion detection is accomplished using a method known as background subtraction. In background subtraction, you store a model of the “background” (whatever your system looks like when there is no motion), and then you compare new images to this background. If there is a large enough difference, you can infer that it was caused by some type of motion.
For simplicity, the background model is a simple running average of all frames seen by the raspberry pi. This is less computationally expensive than more advanced background modelling methods, as discussed here.
To illustrate an example of this, consider the following background model image:

Note: The background image is a blurred, black and white image. Blurring helps reduce noise, while working with black and white images is less computationally heavy. RGB values don’t add much value in motion detection.
Next, we take our latest frame,

then blur it and convert it to black and white so it can be compared to our background image.

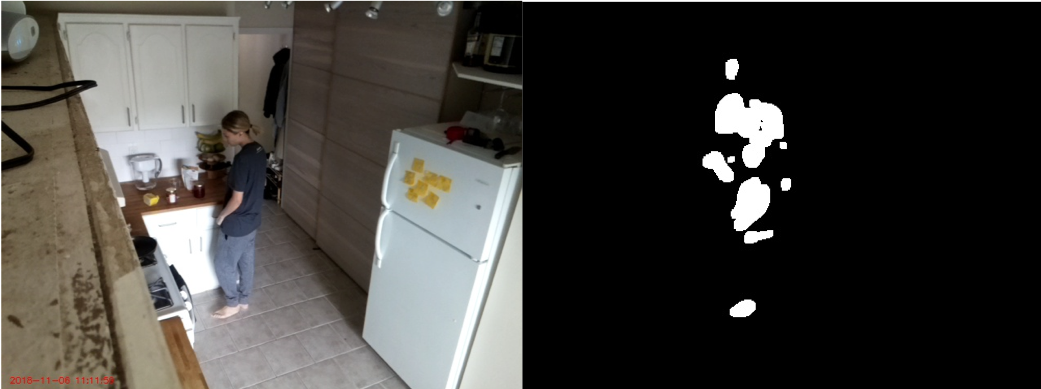
Taking the difference between the two frames yields the following “delta” image:

Next, we threshold (or binarize) the image, by converting all pixels above/below a certain threshold to white or black.

Dilation is then performed to close any gaps. Dilation involves moving a sliding window (kernel) over an image, and updating a given pixel’s value based on the surrounding pixels.

From this thresholded, dilated difference, you can see if the area of the white blobs is greater than a certain threshold, and trigger motion based of that. You can also specify a minimum number of frames where is this large enough difference. See the app/config/config.yml file for all the settings I am using.
You can see how all this is layered together in the demo below.
Note: This method of background subtraction was entirely based off of a blog post by Adrian Rosebrock over at PyImageSearch. There are other background subtraction models built directly into OpenCV, but they are more computationally expensive. Check out the references section at the bottom for a link to his post.
Slack Interface
Slack was used as an interface to the security system since it has a fantastic API, works excellently on mobile and desktop, and removed the need for me to make a GUI.
After creating my slack app, I set up a bunch of slash commands, each of which corresponds to an endpoint in a flask API.
For example, entering /pycam_on in slack triggers this function in my flask application:
@app.route('/pycam_on', methods=["POST"])
@slack_verification()
def pycam_on():
    """Turn on the pycam process.

    Returns:
        str: Response to slack
    """
    if utils.redis_get('camera_status'):
        response = 'Pycam is already running'
    else:
        utils.redis_set('camera_status', True)
        response = "Pycam has been turned on"
    return response
The @slack_verification() decorator ensures the request is coming from slack, since slack sends a unique, private token with each request.
All system settings are stored in a local redis database, which allows for communication between the different python processes running on the raspberry pi (more on this in the next section).
Slack apps also allow for other forms of interactivity, like when I click one of the occupied/unoccupied buttons associated with an image, the following function is called.
@app.route('/interactive', methods=["POST"])
def interactive():
    """This function is triggered after one of the buttons is clicked in slack
    (i.e. the occupied/unoccupied buttons)

    Returns:
        str: Response to slack
    """
    data = utils.parse_slash_post(request.form)

    # grab some metadata associated with the message that was
    # interacted with
    payload = json.loads((data['payload']))
    action = payload['actions'][0]
    action_value = eval(action['value'])
    tag = action_value['occupied']
    img_filename = action_value['filename']

    # Save an empty file with the logged tag
    filename = "{}_{}.txt".format(tag, img_filename.replace('.jpg', ''))
    filepath = os.path.join(config.TRAIN_DIR, filename)
    open(filepath, 'w').close()

    utils.slack_delete_file(action_value['file_id'])
    return 'Response for {} logged'.format(img_filename)
This function checks whether I clicked the “Occupied” or “Unoccupied” button for a given message, and stores my choice, along with the associated image filename, in an empty text file.
Automatically turning the system on and off
Because I didn’t want to be constantly turning the security system on/off whenever I left the house or got home, I needed a way for the system to automatically know whether I was at home.
When playing with my router to set up the port forwarding to my raspberry pi, I noticed it had a page where it showed all the connected devices:
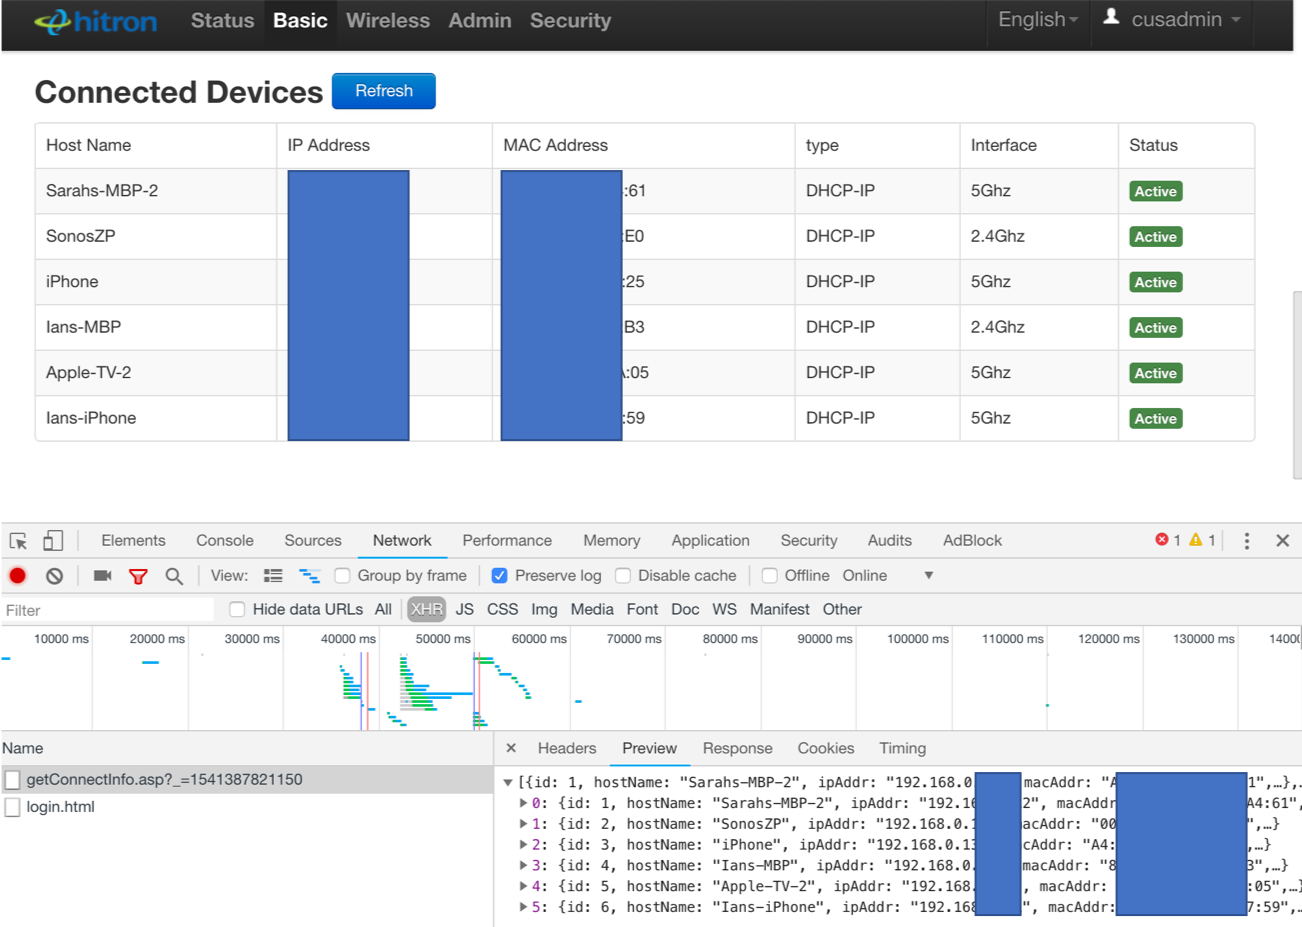
Under the hood, the webpage for my router was making an API call to retrieve this information. After digging through the network requests being made to my router with Chrome’s developer tools, I was able to re-create this API call in python.
import requests

# Create a new requests session
session = requests.session()

# Call the login API with my credentials
response = session.post('<router_login_api_url>', LOGIN_DATA)

# Update my cookie with the new, authenticated user_id
user_str = response.headers['Set-Cookie']
user_id = user_str.split(';')[0].split('userid=')[1]
new_cookie = BASE_COOKIE.format(USERNAME, PWD, user_id)
headers['Cookie'] = new_cookie

# Call api and get connected devices
response = session.get('<get_connected_devices_api_url>', headers=headers)
devices = response.json()
connected_devices = [d['hostName'] for d in devices]
Using this information, I can conclude that either me or my girlfriend is at home if one of our iphones is connected to the wifi, and use that information to turn the security system on or off.
Architecture
The following diagram shows all the running processes on the raspberry pi. Note, only the flask app and security system processes are required to have a working home security system.
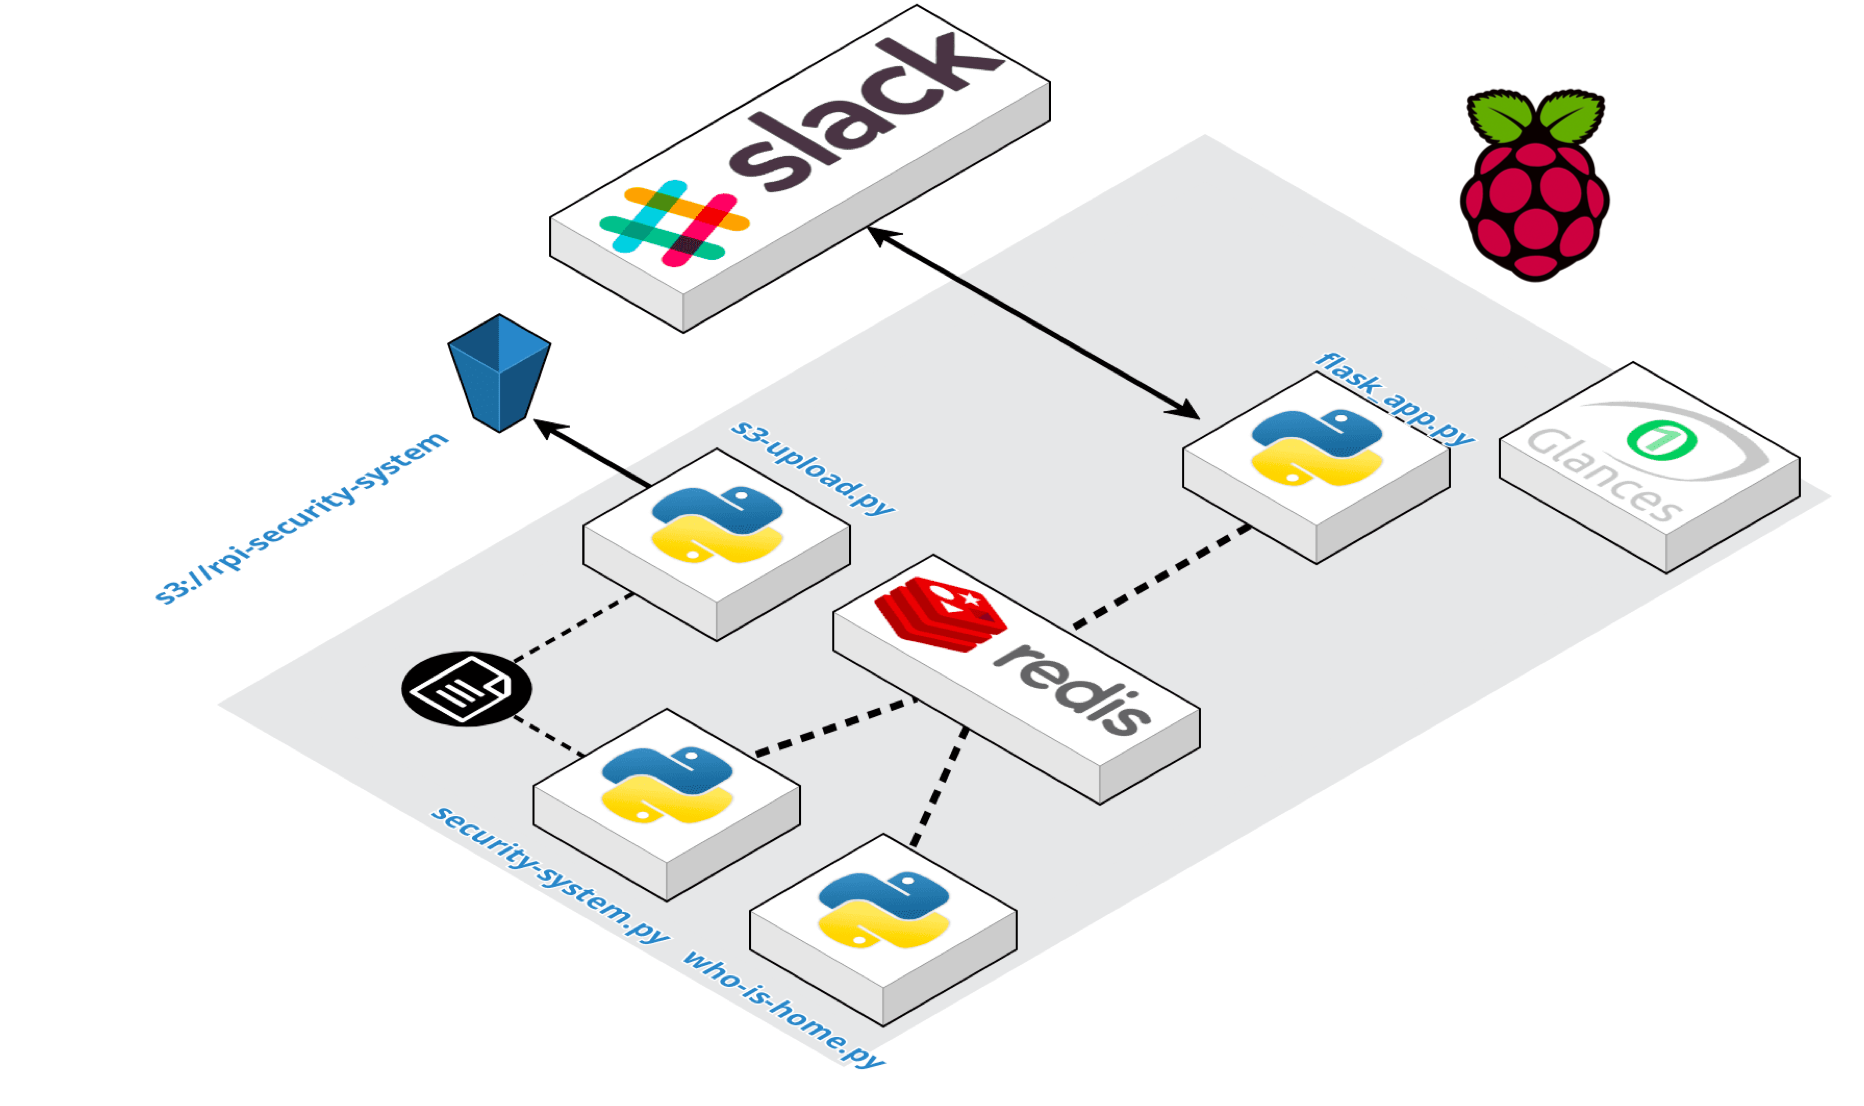
The role of each process is as follows:
1) The flask app handles incoming requests from slack. - the flask app generally communicates with the redis database to answer questions like: “Is the security system set to ON”, “Are notifications turned ON”, or to change any of those values
2) The security-system process has the code which is processing each frame from the camera, and performing background subtraction. Whenever motion is detected, a slack notification is triggered.
- the security system is also constantly checking the 'camera_status' variable in the redis database to see if it should continue running, or shutdown
- Before sending a notification, it checks if they are enabled in the camera_notifications redis variable
- A shutdown can be triggered manually, by a user running /pycam_off in slack, or automatically by the who-is-home process
3) The who-is-home process is constantly checking what devices are connected to the router, and updating the redis database accordingly.
- If no one is home, the process will update the variable in the redis database ('camera_status') to ensure the security system is running. Similarly, if someone is home, the process will update the variable in order to turn the system off
- The who-is-home process can be turned on/off by setting the auto_detect_status redis variable. If I know I am going on vacation for a few weeks, or I left my phone at home connected to the wifi, I may want to turn this off and force the security-system process to run regardless of the connected devices
4) The s3_upload process runs every 5 minutes and uploads any logged training data to S3
5) A glances webserver runs so I can easily check/monitor all the running processes on my pi. More on glances below.
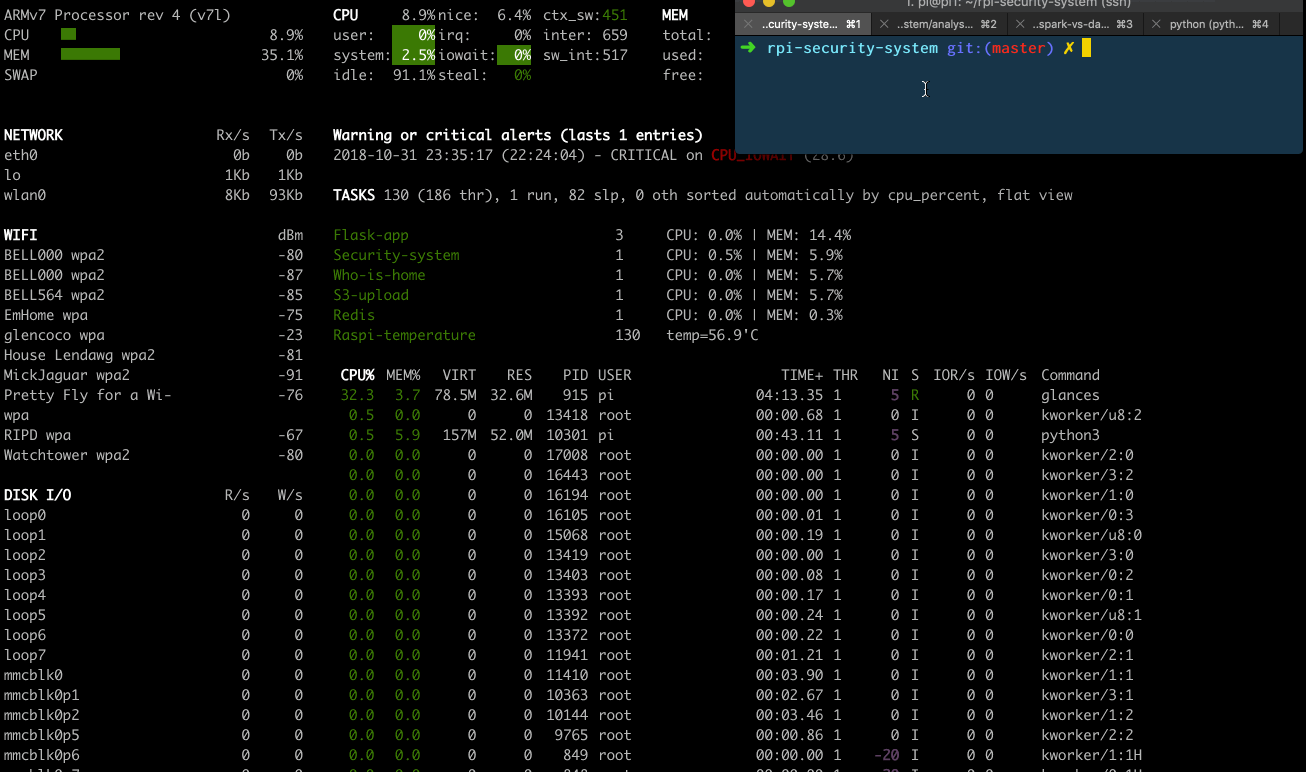
System Monitoring with Glances
The glances webserver provides a pretty slick system dashboard, which can be easily viewed on a desktop browser or a mobile device. As discussed in setup.md, I configured the glances.conf file to monitor the core processes discussed above.
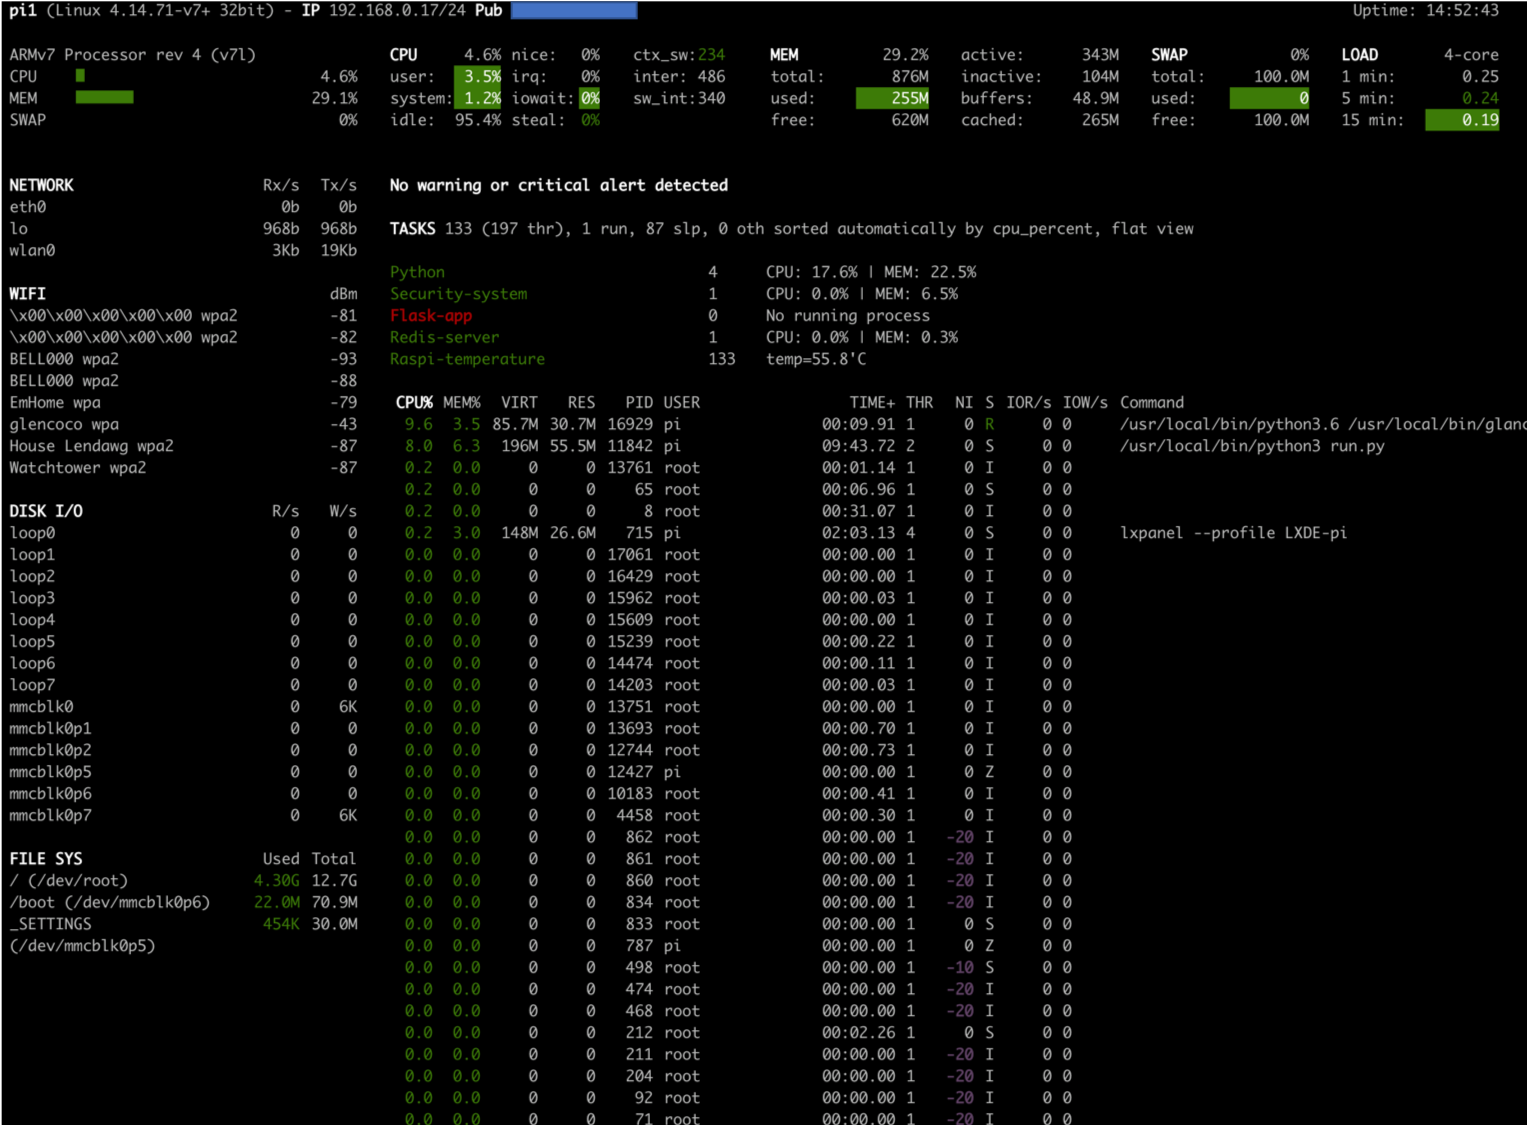
You can see I don’t have a flask process running, which is flagged in red due to the count_min=1 constraint in the glances config.
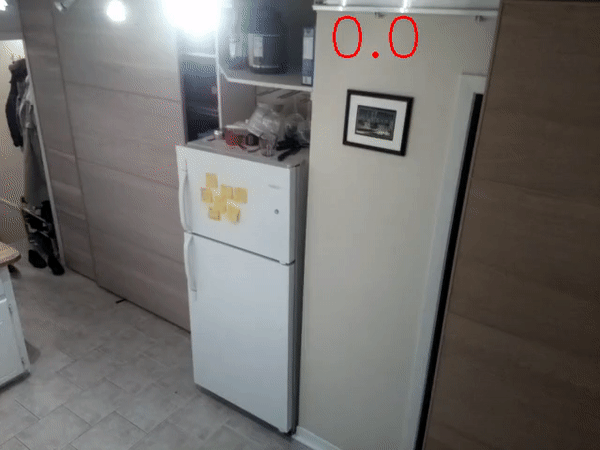
Glances in Action
You can see the power of glances in action, as I manually kill a process and restart it.
Shortly after manually killing the s3 upload process, it turns red in glances, and becomes green again after I restart it.
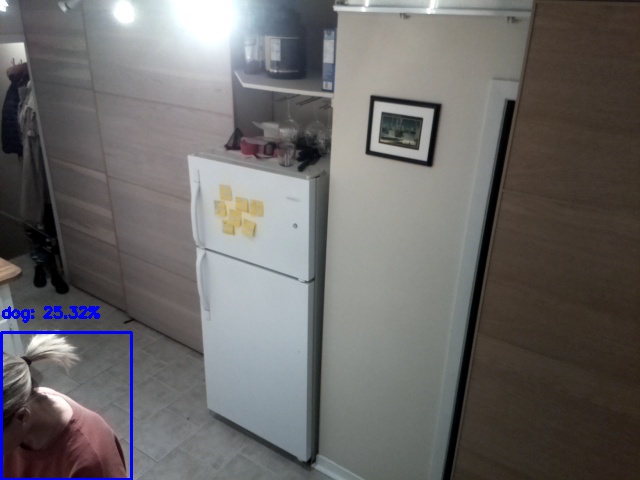
Reducing False Positives with a Pre-Trained Image Classifier
Things like shadows or rapid lighting changes can trigger false positives with the background subtraction method. In order to minimize these false positives, the use of a pre-trained image classifier was explored.
Following this pyimagesearch blogpost, I was able to download a lightweight, pre-trained model from this github repo (downloaded files are in app/model-files of this repo). Running the model was relatively straightforward, thanks to cv2’s built in functionality to read caffee models. See the aforementioned blog post for more details.
You can see an example of the model predicting the probability of a person being present in the camera feed below:
After running the security system for a couple days, I was able to collect a dataset with about ~200 tagged images. Note, I only tagged images when the background-subtraction based method detected motion (i.e. the base motion model thought there was motion detected). There were another ~200 images saved periodically with no motion detected, serving as a sample of true negatives.
Along with each image, I also saved a copy of the last 30 frames (~3 seconds of footage), before the slack alerting event (see the save_pickle function in the app/security-system.py module that takes care of this). A new feature was created based on this last 30 images, person_last_30. If the probability of a person being present was > 0 in any of the last 30 images, person_last_30 was set to 1.
You can see in the table below that layering the person_last_30 indicator along with the original motion_model, gets rid of the six false positives that were triggered due to lighting changes.
| motion_model | person_last_30 | actual | count |
|---|---|---|---|
| 0 | 0 | 0 | 235 |
| 0 | 1 | 1 | 1 |
| 1 | 0 | 0 | 6 |
| 1 | 1 | 1 | 177 |
Note the person_last_30 variable actually picked up a single case that the motion model completely missed (due to the delta image blobs not being big enough).
Lowering the min_area threshold or increasing the number of dilate_iterations in app/config/config.yml would help solve for this.
Overall, layering a pre-trained image classifier shows promising results for improving the security system accuracy. Note, the model is far from perfect, so proceed with caution.
Setup
Check out setup.md for a detailed writeup.
Usage
After completing all the steps documented in setup.md, you can SSH into your pi and run the following.
cd rpi-security-system

# Start flask app, security system and who_is_home
nohup gunicorn -c gunicorn.conf run_flask &
nohup python3 app/security_system.py >> app/logs/security_system.log &
nohup python3 app/who_is_home.py >> app/logs/who_is_home.log 2>&1 &

# start glances for system monitoring
nohup glances -w -p 52962 --disable-plugin docker --password &